Showing posts with label getting started food storage. Show all posts

Sunday, July 4, 2010

Food Storage in Two Easy Steps!

Perhaps the hardest part about food storage is just getting started! I have come up with an plan for starting a basic food storage. There are just two easy steps to follow!

First step: Decide how much money you would like to set aside for food storage each month. This could be as little as $5 per month. (It could also be more than $5, such as $25 or $50 per month, or any amount you choose). Even if the amount you are able to set aside is very small, you will still be able to purchase something. Having something stored is better than having nothing! Over time, you will be able to build up a home storage of basic food.

Second step: Focus on one basic item or category each month. Use your budgeted food storage money to purchase items in the category you are focusing on. 

I have thought of six categories for basic food storage: Water, Grains, Oils, Beans and Legumes, Fruits and Vegetables, Baking Ingredients  If you choose one category each month, and begin storing that item (even in a small amount), at the end of six months you will have a beginning supply of basic food storage items. At that time, you can circle back to the first category. By repeating this cycle every six months, you will quickly begin to have an adequate food storage.

First Food Storage Category: Water

It is recommended to have a two-week supply of water. At a minimum, you should store two quarts per day per person for a two-week period. Some ideas for storing water:

  • Purchase bottled water from a store.
  • Fill previously used plastic juice containers with water (don't use milk cartons).
  • Purchase a food-grade drum and fill it with water
For more information about storing water, including where to purchase large containers, or how to purify water, see one of the April 2010 posts on this blog.


Credit for this idea:
The inspiration for this idea came when I saw another food storage website which had a program called "Baby Steps". I am not copying or using any of their information on this blog, but I thought their idea to divide food storage into small, basic categories was ingenious! You can find that website at: www.foodstoragemadeeasy.net When I looked at it, it seemed to have a lot of information. The "baby steps" program is on the left hand side of the page (scroll down to see it).

I have found that there are many, many food storage websites. I try to provide links to good resources when I find them, in case any of you are interested in finding out more about a certain topic. However, I am trying to keep this blog very basic. I hope that everyone will have a basic food supply stored at home. As I wrote earlier, having something stored is better than having nothing stored! Too often, it seems we are overwhelmed by the endless possibilities of what we could store, and that keeps us from storing anything at all. Better to store something simple and basic than to store nothing!

Tuesday, May 18, 2010

Getting Started--Part Two

These "Getting Started" posts are not necessarily chronological, but might more accurately be called, "Getting Started--Idea One," "Getting Started--Idea Two," etc. The purpose of this blog is to provide several practical, simplified approaches to food storage. Hopefully, everyone will find an idea that works and be able to begin a basic food storage.

This post is for those who would like to have a simple storage of basic foods, saved for an emergency. These are ingredients that could be used to make basic recipes, such as bread, pancakes, soups, etc.

1. Basics List
Store at least one item from each category
  • Grains: wheat, flour, cornmeal, oats, rice, pasta
  • Protein: dry beans, canned meat (beef, chicken, fish), peanut butter
  • Vegetables: canned, dehydrated, or sauce, soup, juice
  • Fruits: canned, dried, juice
  • Dairy products: powdered milk, dried milk, canned milk or shelf milk, powdered eggs
  • Sweeteners: sugar, honey
  • Essential baking ingredients: salt, oil, shortening, yeast, baking powder, baking soda
  • Water
Other items to consider include condiments and seasonings, multi-vitamins, gum, hard candy, basic medicines (for fever/colds) and food for infants and pets (if applicable).

2. Very Basics List
(This one-month supply list was compiled by someone at the LDS Home Storage Center. The "cans" mentioned are the #10 cans sold at the Home Storage Center).
  • Wheat--3 cans
  • White flour--1 can
  • Rice--2 cans
  • Oats--1 can
  • Macaroni--1 can
  • Pinto beans--1 can
  • Sugar--1 can
  • Powdered milk--1 can
  • Shortening--1 can
  • Salt--16 ounces
  • Water--28 gallons

"Church members can begin their home storage by storing basic foods that would be required to keep them alive if they did not have anything else to eat. When members have stored enough of these essentials to meet their needs for one year, they may decide to add other items that they are accustomed to using day to day."
--January 2002 letter
from the First Presidency of The Church of Jesus Christ of Latter-day Saints*

*Some guidelines have been updated. Click here for the March 2009 Ensign article.

Saturday, May 1, 2010

Getting Started--Part One

"The best place to have some food set aside is within our homes, together with a little money in savings. The best welfare program is our own welfare program. Five or six cans of wheat in the home are better than a bushel in the welfare granary.

We can begin ever so modestly. We can begin with a one week’s food supply and gradually build it to a month, and then to three months. I am speaking now of food to cover basic needs. As all of you recognize, this counsel is not new. But I fear that so many feel that a long-term food supply is so far beyond their reach that they make no effort at all."

---Gordon B. Hinckley, LDS Church President, 1995-2008. Click here to read the entire article.

Note: This post is very basic information. If it is too basic, skip to another post on this blog. There's a wide variety of information already posted, and more to come!

Start small
  • Don't be overwhelmed by everything you could store, or everything someone else might know about food storage. Start where you are.
  • Open your kitchen cupboards. What food do you already have at home? If, suddenly, all you had to eat was the food in your cupboards, how long would it last?
  • You probably already have at least a one-day food storage! You might even have enough for a week!Are there foods that would complement what you already have, to complete a week's storage of food? Do you have spaghetti noodles, but no sauce? Add "spaghetti sauce" to your grocery list. Put that can of sauce with the spaghetti noodles you already have. Now you have one meal in food storage.

Start with a week's supply of food
  • What do you ordinarily eat? Write down a week's worth meals that you typically eat. This could be cold cereal for breakfast, peanut butter and jelly for lunch, crackers for a snack and spaghetti noodles with spaghetti sauce for dinner.
  • Purchase those items on your next trip to the grocery store. If necessary, set aside a little money each week until you are able to purchase those items.
  • Set this "week's supply" aside in your home. It could be set aside for a year, while you work and save to build a longer term supply. While you are working and saving you will have the satisfaction of knowing that you have a week's supply available for any circumstance.
  • After you have accumulated a longer-term storage, then incorporate that week's supply of food into your longer-term storage and rotation.
Purchase basic, shelf-stable foods for your beginning food storage.
  • You don't need a lot of storage space, fancy storage containers or a deep freeze for a week's supply of food.
  • You don't need to know how to bake bread or can your own food!
  • Choose foods that you typically eat, purchase a supply to last one week, and set it aside. Supermarkets are well-stocked with foods that have a long shelf-life. These include canned fruits and vegetables, pastas, rice, cereals, and items such as peanut butter, pudding, and juice.

Previous posts focus on a three-month storage and a year-supply of basic food storage. You can see the archives of this blog for a variety of information. The March 2009, April 2009 and May 2009 posts have a lot of information about how to start a food storage, including where and how to store it.

Click here for a link to an excellent article about beginning a basic food storage. This was published in the Ensign March 2009.

Click here for counsel and direction for Family Home Food Storage, published by the LDS church First Presidency, 2007. (Scroll to the middle of the page, click on "Family Home Storage pamphlet").

Sunday, March 7, 2010

Family Home Storage

The LDS church has posted some new information about Family Home Storage on their provident living website. This website is found at www.providentliving.org

Once you are at the website, look on the left side for a link to "Family Home Storage"

The middle section of the page contains links for information about:

Three-Month Supply
Drinking Water
Longer-Term Supply

The right side of the page contains links for:

Family Home Storage pamphlet
Family Finances pamphlet
Home Storage Center order form
Quotes and Talks from Church leaders
Family Home Storage Lesson Materials
Frequently Asked Questions

The Frequently Asked Questions link takes you to information about:

Where do I start?
What is the difference between three-month and longer-term supply items?
What containers are suitable?
What about 72-hour kits?

These resources provide quite a bit of useful information for getting started in home food storage.

Tuesday, June 2, 2009

Websites for budgeting, groceries and coupons

This post contains a list of local resources and websites that have been recommended by members of our ward who have found them useful in budgeting for groceries and storing food. Perhaps a little money saved each week on groceries could be set aside for acquiring basic food storage.

Thanks to everyone who shared their ideas!

Websites with helpful information:

Finances information and budgeting worksheet.
Click here for a link to the Family Finances page of the LDS church's Provident Living website
Click here for a budgeting worksheet

Recipes using basic ingredients published by USDA.
Click here for a link to this USDA site. Halfway down the screen you will see a "Recipe Finder" box. Enter an ingredient. A list of recipes will come back, each one rated by people who have used them. I entered "beans" and a quick, easy recipe for bean burritos came back. It used inexpensive ingredients, was quick to make, and looked delicious.

$70 weekly menu planning. This is a website with many recipes and ideas for budgeting.
Click here for a link to a page with a week's worth of menus for $70. A good idea starter.

Coupons and Online Grocery Ads
Many people use coupons and online grocery ads very effectively to reduce the money spent on groceries. Here are some websites that have been recommended as helpful:

Local grocery store online ads:
Click here for a link to the Aldi ad
Click here for a link to the Hy-vee ad
Click here for a link to the Price Chopper ad
Click here for a link to the HenHouse ad

Also, keep in mind that stores (such as Price Chopper) will often have different prices depending on the part of town in which they are located.


Saturday, May 30, 2009

Store what you eat and eat what you store

This post is an overview of some basic ideas of how to get started with your food storage.
  • The purpose of food storage is to have food on hand for yourself and your family in time of need, so the food you store should be food that you like to eat.
  • Regularly eat the food you have stored, and regularly replace it. This way, the stored food will retain its nutritional value, and will still taste good.
  • Of course, if properly packaged and stored, many foods will last for decades.

Start small--set a goal to have enough for one month:
By gradually setting aside food, it is possible to accumulate storage for one month, then three months, then six months, then a year.

First idea to get started with food storage--Make a list:
Write a list of main dishes that you regularly prepare for dinner.
For example, your list might include: Stir fry with vegetables, chicken and rice, spaghetti, taco salad, chicken noodle soup, sandwiches, etc.

Next, categorize food items needed for the meals on your list:
On a separate piece of paper, title five columns:
1. Grains/Bulk foods 2. Canned goods 3. Frozen foods 4. Fresh foods 5. Other items.

Now, take each main dish that you wrote down earlier and write the ingredient for that dish under the appropriate columns.
For example, the main dish of "stir fry" would have "Rice" in the "Grains/Bulk foods" column. It would have "vegetables" and "chicken" under the "Frozen foods" column. It would have "soy sauce" and "corn starch" under the "Other items" column.

Calculate amounts needed:
If you have 30 main dishes on your list, then that is about the amount of food needed for a one month supply. If you multiply that amount by 12, you will have the amount needed for a one year supply.

Remember lunch and breakfast:
Repeat this same exercise with lunch foods and breakfast foods.

Side dishes:
Of course, most meals aren't just a main dish, they also include side dishes. It is probably a good idea to store food for side dishes, but I personally haven't worried too much about side dishes because most of our side dishes are fresh fruit and vegetables and garden salads which are hard to store. Also, in hard times, I figure if we have ingredients for main dishes we'll still have something nutritious and filling. (Also, knowing how to make something such as bread is useful for "hard times" because bread is so filling. If we were living exclusively off of our food storage and were able to make bread to eat if we were still hungry after a meal, that would be very helpful) (For this reason, we also store plenty of flour and other bread ingredients).

Another idea: keeping a record of foods eaten and used over one month:
If you are trying to figure out what food to store for your family and in what quantity, and the idea listed above doesn't suit you, here is another idea:
Tape a paper to your refrigerator. Then, for one month, record the meals you ate, and the ingredients used. At the end of the month, you will have a good record of what is needed to feed your family for one month. Multiply this by 12 and you have the amounts needed for a year's supply. You can then divide the items on this list into the columns I suggested above.
This is actually the system we used when we were beginning our food storage, and it was helpful and accurate, but painstaking to keep track of everything for an entire month.

Shopping and storing:
Once you have your food listed into columns, it is easier to start accumulating a supply. The easiest and least expensive to purchase and store are the "Bulk/Grain items." This is a good place to start, too, because these foods are nutritious and very filling. Bulk grain items are available from the church Home Storage Center at very good prices. You can purchase them in bulk and bring them home to store in your own containers. Or, you can put them in the #10 tin cans or mylar pouches. If you have questions about the Home Storage Center you can look on the church's Provident Living website (www.providentliving.org) or call the local center at (816) 453-2398. I can also help answer your questions.
Next, begin storing the "canned foods" and "frozen items" and "other items." These items often come on sale and then you can stock up. Some stores will give you a discount when you buy large quantities, and retailers such as Costco and Sam's Club often have good prices on bulk foods such as these. Also, every year in early June, Diana coordinates a bulk purchase of frozen food from Bithell farms. This is excellent fruit and a good price. If you are interested, call Diana.
The last category on your storage list is "fresh foods." Obviously, we cannot store fresh foods in our long term storage as "fresh" foods. However, we can often find many of those foods "frozen" "canned" or "dried." If "fresh" foods are a large part of your menus, then it is a good idea to find the same foods prepared a different way to keep in your food storage. Diana also coordinates a bulk purchase from Emergency Essentials each month. They sell many of these types of foods in bulk quantities. Contact her if you would like to have information about Emergency Essentials.

Find a good system for storing and rotating food:
I have posted a few ideas of how to store/rotate food in earlier posts. I hope to post some more ideas soon. A good system will have the food easily accessible when you cook. This usually means that some of the food is in or near the kitchen. The other food can be in a basement or other storage room. Find a system that works with where you live and how you cook. If any of you have good ideas, please comment and I will add them here.

Freezers:
Many food storage items can be stored in buckets and on shelves. However, if you have a deep freezer, it can be a valuable asset to your food storage. Many items store well in a freezer, such as meats, cheese, yeast, bread, fruits and vegetables. If you do have a freezer, you may want to consider what you would do if the power were out for a long time. A generator is a good solution for this.

A note on storing/rotating food:
For the most part, we regularly eat what we have stored. The exception to this is that we don't eat a lot of powdered milk at this time. In times of unemployment and very limited grocery budget, we have used powdered milk exclusively, because it was just $1 a gallon. Since we currently drink store-bought milk most of the time, this is how I rotate my powdered milk storage: I try to keep a pitcher of re-constituted powdered milk in the fridge, and I use it for cooking (soups, breads, almost any recipe that calls for milk) (except for puddings--puddings won't set up if you use powdered milk). I also have a few recipes that call for dry powdered milk. One recipe is for homemade pizza crust and the other recipe is for a chocolate shake that tastes quite a bit like a Wendy's frosty. I found that recipe on a website called Hillbilly Homemaker.
So, while it is a good idea to eat and rotate the food that you store, if there are foods that you want to store, but don't want to regularly eat, there are probably still ways that you can use them a little at a time. Another example is with flour. If you prefer white flour, but want to store wheat flour, you can try mixing a little wheat flour in with your white flour (from as little as one cup of wheat flour in a big bin of white flour to a half wheat/half white mixture).

Another note on bulk/grain items and bread:
Bulk/grain items used to be the main product in food storage. There has been a shift from that now, and it is recommended that we store what we eat instead of storing 500 pounds of wheat that we will never eat. However, I think it is a good idea to learn to use bulk/grain items, even just a little bit. Here's why: They are economical to purchase, they store well long-term, they don't take up much storage space, they are nutritious and filling, and they are in keeping with the Word of Wisdom. So, even if you don't "like" wheat or other grain items, I still think it is a good idea to use them every once in a while (maybe a bowl of oatmeal for breakfast once a month, for example), and to have a little of them stored. I think it is also a good idea to know how to make at least one bread item (white bread, wheat bread, rolls, breadsticks or biscuits) and to store the ingredients to make that time (yeast, flour, sugar, shortening, or whatever your recipe calls for).

A note on menus that don't use bulk items/grains:
Some people (such as diabetics, for example) have a particular type of diet. Others prefer a menu of fresh vegetables. If your diet does easily fit into the guidelines listed above, then it is important to find food storage items that will fit into your specific menus. An easy way to begin would be to think: If I needed to live off of my food storage for a few days or weeks, what would I want to have stored? (This is probable for a number of reasons from personal financial needs (unemployment) to wider economic circumstances, to a natural disaster (such as a flood, tornado or earthquake) when access to grocery stores may be limited. In this case, you might not be able to eat like usual, but what foods can you store that would be closest to what you typically eat? The answer may be in purchasing high-quality freeze-dried foods (from a company like Emergency Essentials, for example). These are more expensive and you may choose NOT to rotate them, but to keep them on hand for an emergency. Another alternative is to grow a garden which would provide food in the summer and fall. Many vegetables and herbs can be grown in small quantities inside a house. Potted plants can be grown year-round on a kitchen counter or on a table near a window in any room of the house.

A note on "other" items in food storage:
Some of the "other" items in your storage list may be nice ingredients to have, but not essential. Others, such as baking powder, yeast or oil, may be necessary to make foods such as bread. Be sure to store those "essential" items are part of your food storage. It is also nice to have "other" ingredients on hand to give flaovr and variety to the foods you have stored. Some examples are below:

Spices and flavorings:
Most spices and flavorings are very inexpensive and store well for a long time. They are an invaluable part of food storage, because they can create variety and good flavor in many ordinary foods. Some ideas of spices and flavorings to keep on hand are: vanilla, cinnamon, brown sugar, honey, jam, jelly, bouillon, garlic, salt, pepper, ketchup, barbeque sauce, salad dressing and cheese.

Snacks:
Many families, especially with young children, are accustomed to eating snacks throughout the day. Although it is not practical to have a year's supply of snacks on hand, it is a good idea to have some snack items in your food storage. Examples of snack foods that store well are: raisins, dried fruit, flavored drink packets and crackers.

Holidays:
It is a good idea to think of holidays and birthday or other traditions that your family has which involve food. For example, if you celebrate birthdays in your family with cake, and you don't make cakes and frosting from scratch, it might be a good idea to store cake mixes and frosting for the birthdays in your family. An easy way to do this would be to buy a cake mix for every person at the beginning of the year. Put them on a shelf in your food storage and use them during the year. Replace them at the beginning of the next year.

Medicine and Illness:
If you have certain dietary needs or medical needs, be sure to include those items in your food storage, too. For example, for a while one of our children took a medicine that was mixed with applesauce. We kept several packages of applesauce in our food storage. Other items to think about are soda crackers, chicken broth, juice and Gatorade.

Tuesday, April 21, 2009

Where to put all this food storage

One of the most important principles with food storage is to store what you eat, and eat what you store. To do that, find a place in your home where you can store large quantities of food, such as canned goods and bulk items. You should also designate a place in or near your kitchen to keep smaller quantities of those items to use when you are cooking.

Most people already have a kitchen cupboard or shelf that they use for a pantry. Here is an example of kitchen shelves with small containers for items such as flour, rice, sugar, beans, etc.:


Larger containers of those same items could be kept in a storage room. When the smaller containers in the kitchen are empty they can be refilled from the larger containers in the storage room. This is a good system for rotating and using food storage.

However, even if you don't have a separate room for food storage, it is still possible to find places to store food. Below are a few ideas.

Build or buy shelves for food storage. These shelves could be in the basement or in a closet anywhere in the house:


You can also put food into boxes. Boxes are a good idea for storing smaller items (such as spices, cake mixes, or jello). Boxes are also good for stacking, so you can fit more food in a small space. (Be sure to label the boxes!)

You can purchase clear plastic containers, or you can use cardboard boxes. Many grocery stores will give you their cardboard boxes if you ask. Produce boxes are especially suited for stacking and storing. If you or your neighbors have a home-based business, you may have access to cardboard boxes of similar size, such as these boxes:


If you store a lot of canned goods, a rolling shelf such as this one makes it easy to organize and rotate the food. The shelves are slanted, so you put newly purchased items in at one end and they roll forward. When you need a can you take it from the forward end, so you are always using the oldest cans first. These are fairly simple to build.


Dry food items (such as grains) are easily stored in air-tight buckets (which were described in more detail in the previous post). It is recommended that these buckets not be stored directly on the floor (to avoid condensation inside the bucket). In this picture you will see that they are sitting on a small platform:

In the next picture you will see an island of buckets. This is a food storage room with shelves built along the walls. The room had a lot of empty space in the middle. There is a pallet in the middle of the floor. There are 27 buckets stacked up on this pallet. Most of the buckets are easily accessible, and there is room to walk all the way around this "island."


If you don't have a storage room, you can still have food storage. Here is another place to store food--under a bed. If you have a bedskirt, the food will not be visible from the room. If you store food around the house like this, it is helpful to keep a list of where food is. You can also keep a tally on the list and mark each time an item is used so you know when to replace it.


Here is another creative place to store food. This couch is at an angle in the corner. What is behind the couch is not visible from anywhere in the room:

But if you could see behind the couch you would find two buckets with bulk food storage:


This is an end table with a lamp on top:


But the end table is actually a bucket of food storage:


If you have more ideas, please comment and share them!

Friday, April 3, 2009

Food Storage Containers

There are several ways to store items purchased for food storage. Always use a food-grade container. (Food grade containers will be labeled "PETE" or "PET"). Store food in tightly sealed containers to keep them free from insects. Food will store best and longest if it is in a cool, dark, dry place, and in an air-tight container.


I have not seen these pails for sale at local stores, but you can do a Google search for "5 gallon plastic pail" and find many online retailers. A member of our ward orders items such as these each month from Emergency Essentials. By ordering as a group we can save on shipping. Contact me if you are interested in this.


These buckets come with this style of lid:


This type of lid works fine. You may wish to purchase a lid lifter to help open the lids. (A lid lifter is about $5 and you only need one lifter--it can be used repeatedly on multiple buckets).

You can also purchase a gamma seal lid which can be twisted open easily. If you are regularly using your bulk storage items, and if you don't mind spending the extra money (about $6 apiece), this is a very convenient lid.


You can often get similar buckets for free from a local bakery (including a bakery in a grocery store). Their frosting and other items come in these and they typically just throw them away. They will often save them for you if you ask, or they will tell you a good time of day/week to come and collect them. Usually the lids will seal fine, but sometimes they have been opened carelessly and don't quite shut tight anymore. If they don't shut tight, then use them for pre-packaged foods (such as raisins, Jell-o, pasta, etc.) because without a tight seal, they will not keep insects out of open grains, etc. This is a frosting bucket from a bakery:


You can purchase bulk foods from the church home storage center in Kansas City. You can also package these bulk foods at the home storage center. There are two options for packaging: in #10 cans, or in mylar pouches. For more information, you can contact the home storage center (816-453-4269), or you can ask me.


You can also use plastic containers such as Rubbermaid storage containers (see container with blue lid in the photo below). You can re-use thick plastic containers that have previously held other food items (such as the apple juice container which is now used to hold rice, also in the photo below). You can use other containers as well, such as these two glass or plastic containers that previously held other food items.

Just make sure that all containers are clean and dry and can be properly shut. Make sure they are food-grade and made of thick, sturdy plastic. (Milk cartons, for example, are not sturdy enough for long-term storage of liquid, and not thick enough to keep out weevil or other insects).

Saturday, March 7, 2009

Getting Started

Here are some ideas for beginning a food storage plan in your home:

1. Begin by storing one week's worth of food that your family eats.
Go shopping and purchase two week's worth of food, if possible. At the end of the first week, go shopping again and purchase another week's worth of food (you will still have one week's worth of food left from your shopping trip last week, plus, the week's worth of food that you buy at this shopping trip). Repeat this every week, and you will always have a week's worth of food on hand.


2. Store a basic food item.
If there is a basic food item (such as rice, pasta, flour) that your family eats regularly, purchase this item in bulk (such as 20 pounds worth) and store it in a clean, airtight container. Keep track of how long it takes you to use it. Gradually purchase a little more (for example, purchase an additional 20 pounds before you have completely used the first 20 pounds) and build up a storage in this way. I will write a longer post on storage containers soon.


3. Store water.
To begin, you could buy a case of bottled water and store it in your home. You can also re-fill sturdy plastic bottles with water. (By "sturdy plastic" I mean apple juice bottles, for example. Don't use milk bottles because they quickly deteriorate and will leak). I will write a future post about water storage and containers.


4. Grow something.
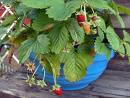
Begin by growing something. This could be a small potted plant of chives, grown on your kitchen counter. It could be a planter box on your porch or deck with strawberries or tomatoes. It could be a small box garden in your yard. Or, if you are ambitious, it could be a larger garden in your yard, a berry patch, or a fruit tree. I will add posts about all of those things soon.

There is an excellent article in the Ensign (March 2009) about this basic, simple approach to food storage. (Click on the link to read the article).